
Getting Started
Build Manual Mode
Build manual mode lets you build a product one milestone at a time. QuantCAD suggests a milestone plan, builds one step, and waits for you to review, change or ask about it before the next.
Last updated
What Build manual mode does
In manual mode you build your product the way an engineer works on a real project: one step at a time, checking each result before you move on. QuantCAD:
- • Reads your prompt and suggests a milestone plan: the parts to build and a good order to build them in.
- • Builds the first milestone, then stops so you can review it.
- • Builds the next milestone only when you ask for it.
- • Saves every step as a new revision, so you can go back to any earlier step.
Between steps you can change what was built, ask questions or build the milestones in another order. Every part is a B-rep solid, so the result exports to STEP and STL and opens as solids in other CAD tools. Build manual mode is included on every plan, including Free.
Manual or auto
Both modes build the same kind of product. The difference is the order you work in:
Manual: bottom up
You build the product part by part and shape each part before the next one is added. You decide what gets built, and when.
Best when you want control over every step, or when the design is still taking shape.
Auto: top down
QuantCAD builds the whole product in one action. You then change the parts that need it.
Best when you know what the finished product should be. See Build Auto Mode.
How to start a manual build
Open New Product
From the dashboard sidebar, click New Product. The page asks “What do you want to build?”
Choose Manual and the reasoning level
At the bottom of the prompt box, open the mode menu. It shows Auto by default. Choose Manual, described as “Step by step, one part at a time”. Next to it, the QuantCAD AI control shows the reasoning level. High is the default.
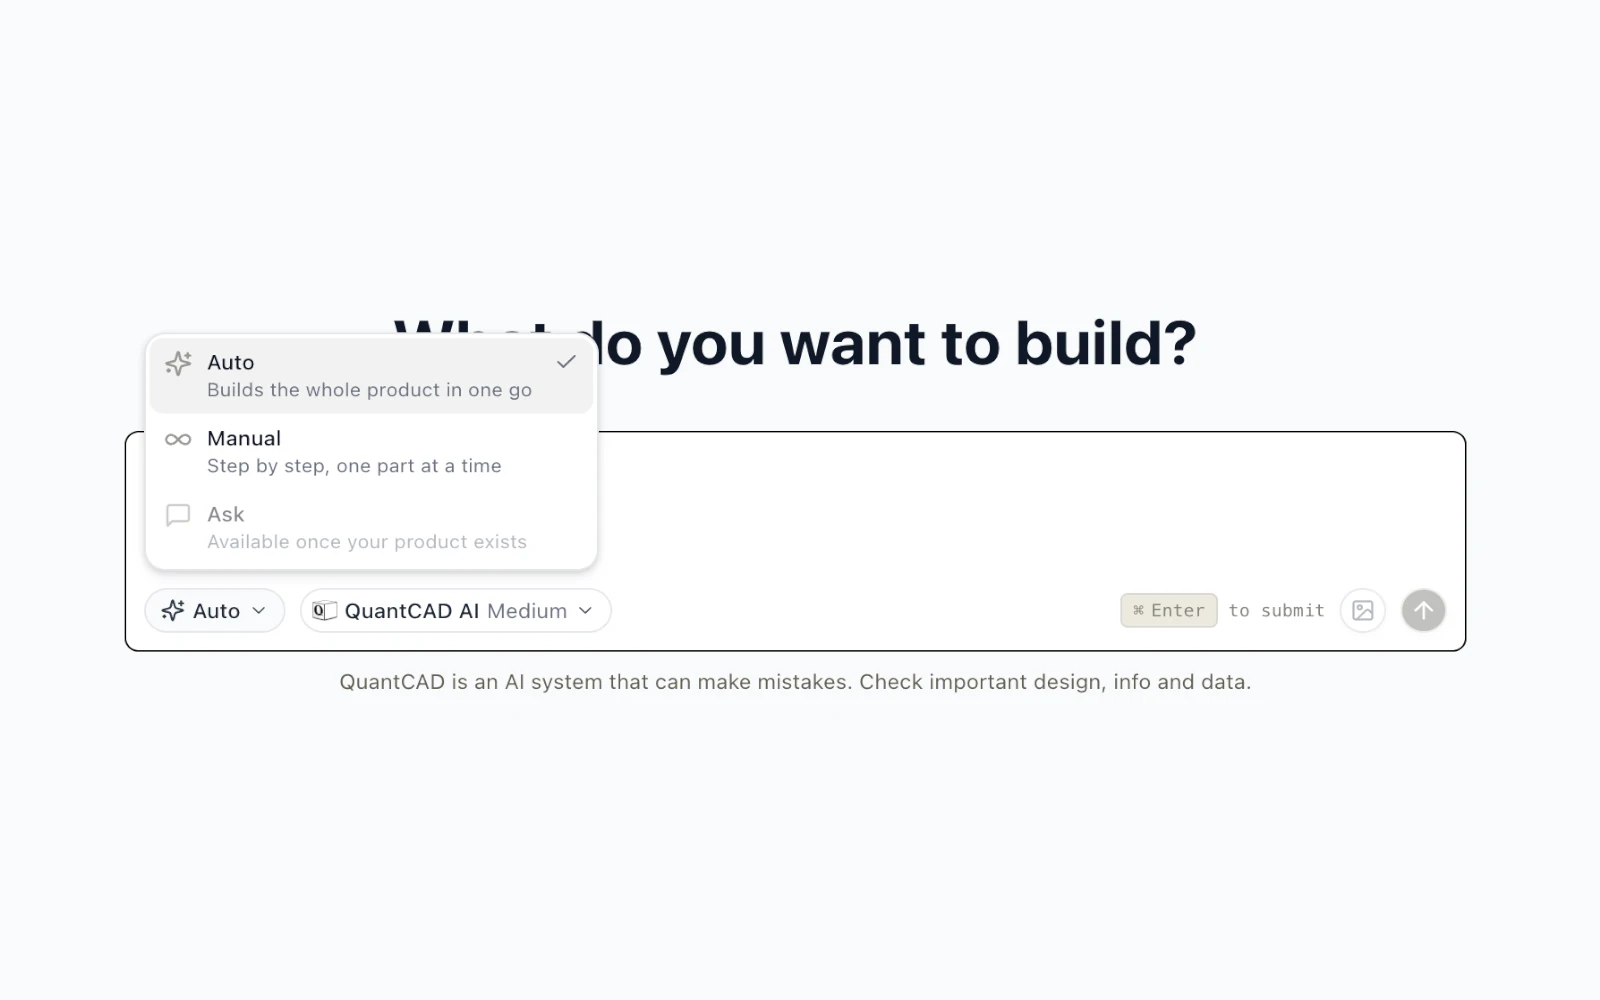
Describe the whole product and submit
Describe the complete product, not only the first part. QuantCAD uses the full description to plan the milestones. Then press ⌘ Enter (or Ctrl Enter).
The milestone plan
After you submit, QuantCAD posts a plan in the chat under Milestones for your Assembly. Each milestone has a letter (A, B, C and so on), a title and a short description of what it covers.
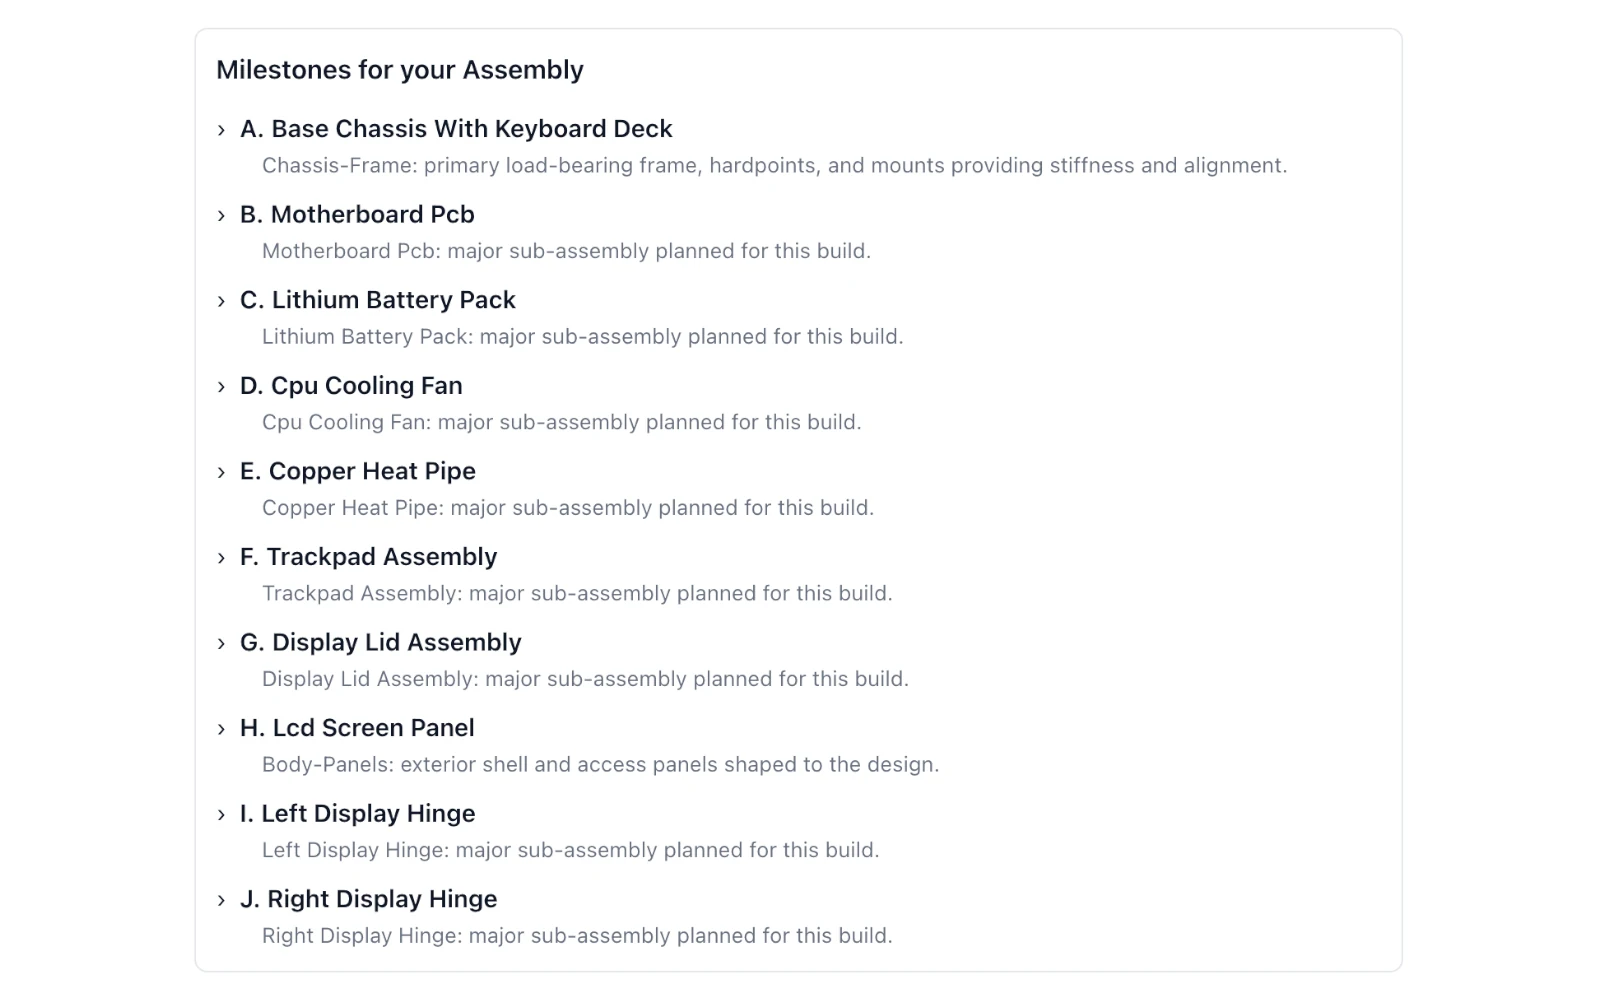
The plan is a recommendation, not a rule. It shows a sensible order to reach the product you described, and you can follow it, change the order or build parts it does not include.
QuantCAD then builds milestone A. The result contains only that milestone. The other parts appear as you build them.
Building step by step
After each step, QuantCAD names the milestone it suggests next. From there you choose what happens:
- • Build the suggested milestone: simply reply with for example; yes, ok or continue.
- • Build a milestone out of order: reply with its letter, such as C, Step C or Build C.
- • Change a part you already built: describe the change in plain words, with sizes where they matter.
- • Add a part that is not in the plan: describe the part and where it goes.
yes
Build C
Make the base plate 3 mm thick and add four M4 holes, one in each corner.
Add a cable clip to the back of the housing.
Each Build creates a new revision. If a step does not turn out the way you want, switch back to an earlier revision. See Versions & Revisions.
Ask for advice along the way
Switch the chat to Ask when you want a second opinion before the next step. Use it the way you would ask an experienced engineer at the next desk: check sizes and fits, compare two ways of doing something or ask what to build next. Ask never changes the model.
"Which milestone should I build next, and why?"
"Is a 2 mm wall strong enough for this housing if I 3D print it in PETG?"
"Will the battery pack fit between the two end caps with 1 mm clearance?"
"Should I mount the circuit board on standoffs or with snap-fits?"
If Ask recommends a milestone, switch back to Build and reply ok to build it. You can add changes in the same reply, for example “ok, but make it 5 mm longer”. See Ask Mode for more on asking questions.
Writing the first prompt
You build in steps, but the plan comes from your first prompt. The more of these four things you include, the better the plan fits what you have in mind:
- • What the product is and what it is for.
- • The parts it is made of, including the ones inside.
- • How the parts connect or where each one sits.
- • The sizes that matter, with units: overall size, wall thickness, holes and openings.
A desk lamp with a weighted round base, 160 mm in diameter and 20 mm thick.
A hollow vertical post, 300 mm tall and 25 mm in diameter, on the center of the base.
An arm, 250 mm long, on a hinge at the top of the post.
A lamp head with a 60 mm opening at the end of the arm.
A cable channel through the post and the arm.
More patterns for sizes, features and constraints are in Writing Good Prompts.
Reasoning level
The reasoning level applies to every Build prompt in manual mode, and you can change it for each step: High or Max for a complex part, Low for a small change. See Reasoning Levels for which level suits which kind of work.
What it costs
Every step is its own Build prompt, charged by its size and complexity. As a guide: around 20 credits for a small edit, 40 for a standard build, 70 for a large build and 110 for the largest. A new product typically starts at 40 credits, and an Ask question typically costs 10. These amounts are at the default High reasoning level. These are typical amounts, not fixed prices. The cost of each prompt depends on how complex the request is and on its reasoning level, so it can vary from prompt to prompt. The Usage page in your dashboard shows what each prompt cost. Low and Medium reasoning can use fewer credits than the default High, and Max, on Pro and Business, uses more.
Credits are reserved when a step starts and charged when it completes. If you stop a run, the reserved credits are returned to your account. See Credits & Plans for what your credits cover on each plan.
Good to know
- • You choose manual or auto when you create a product. Inside an existing product, the chat offers Build and Ask.
- • You can export the product as STEP or STL after any step, not only at the end.
- • Check dimensions, tolerances and fits in the 3D viewer before you manufacture anything.
Want to see finished results? The worked examples in Build Auto Mode show complete parts and assemblies, with STEP and STL files you can download.